Documentation Index
Fetch the complete documentation index at: https://docs.inya.ai/llms.txt
Use this file to discover all available pages before exploring further.
Introduction & Context
Creating an agent is where the magic happens! This is where you create your GenAI assistant that interacts with users, making conversations based on the knowledge base and prompt that you’ve added.Lesson 1: Starting from Scratch or Using a Template
- From Scratch:
- When to Use: When you want full control and customization.
- How:
- Go to Manage Agents → Create Agent → Create from Scratch.
-
Name your agent, give a description for your understanding and click on Create.

- Using a Template:
- When to Use: When you need a quick start, use templates as they include pre-written system prompts.
- How:
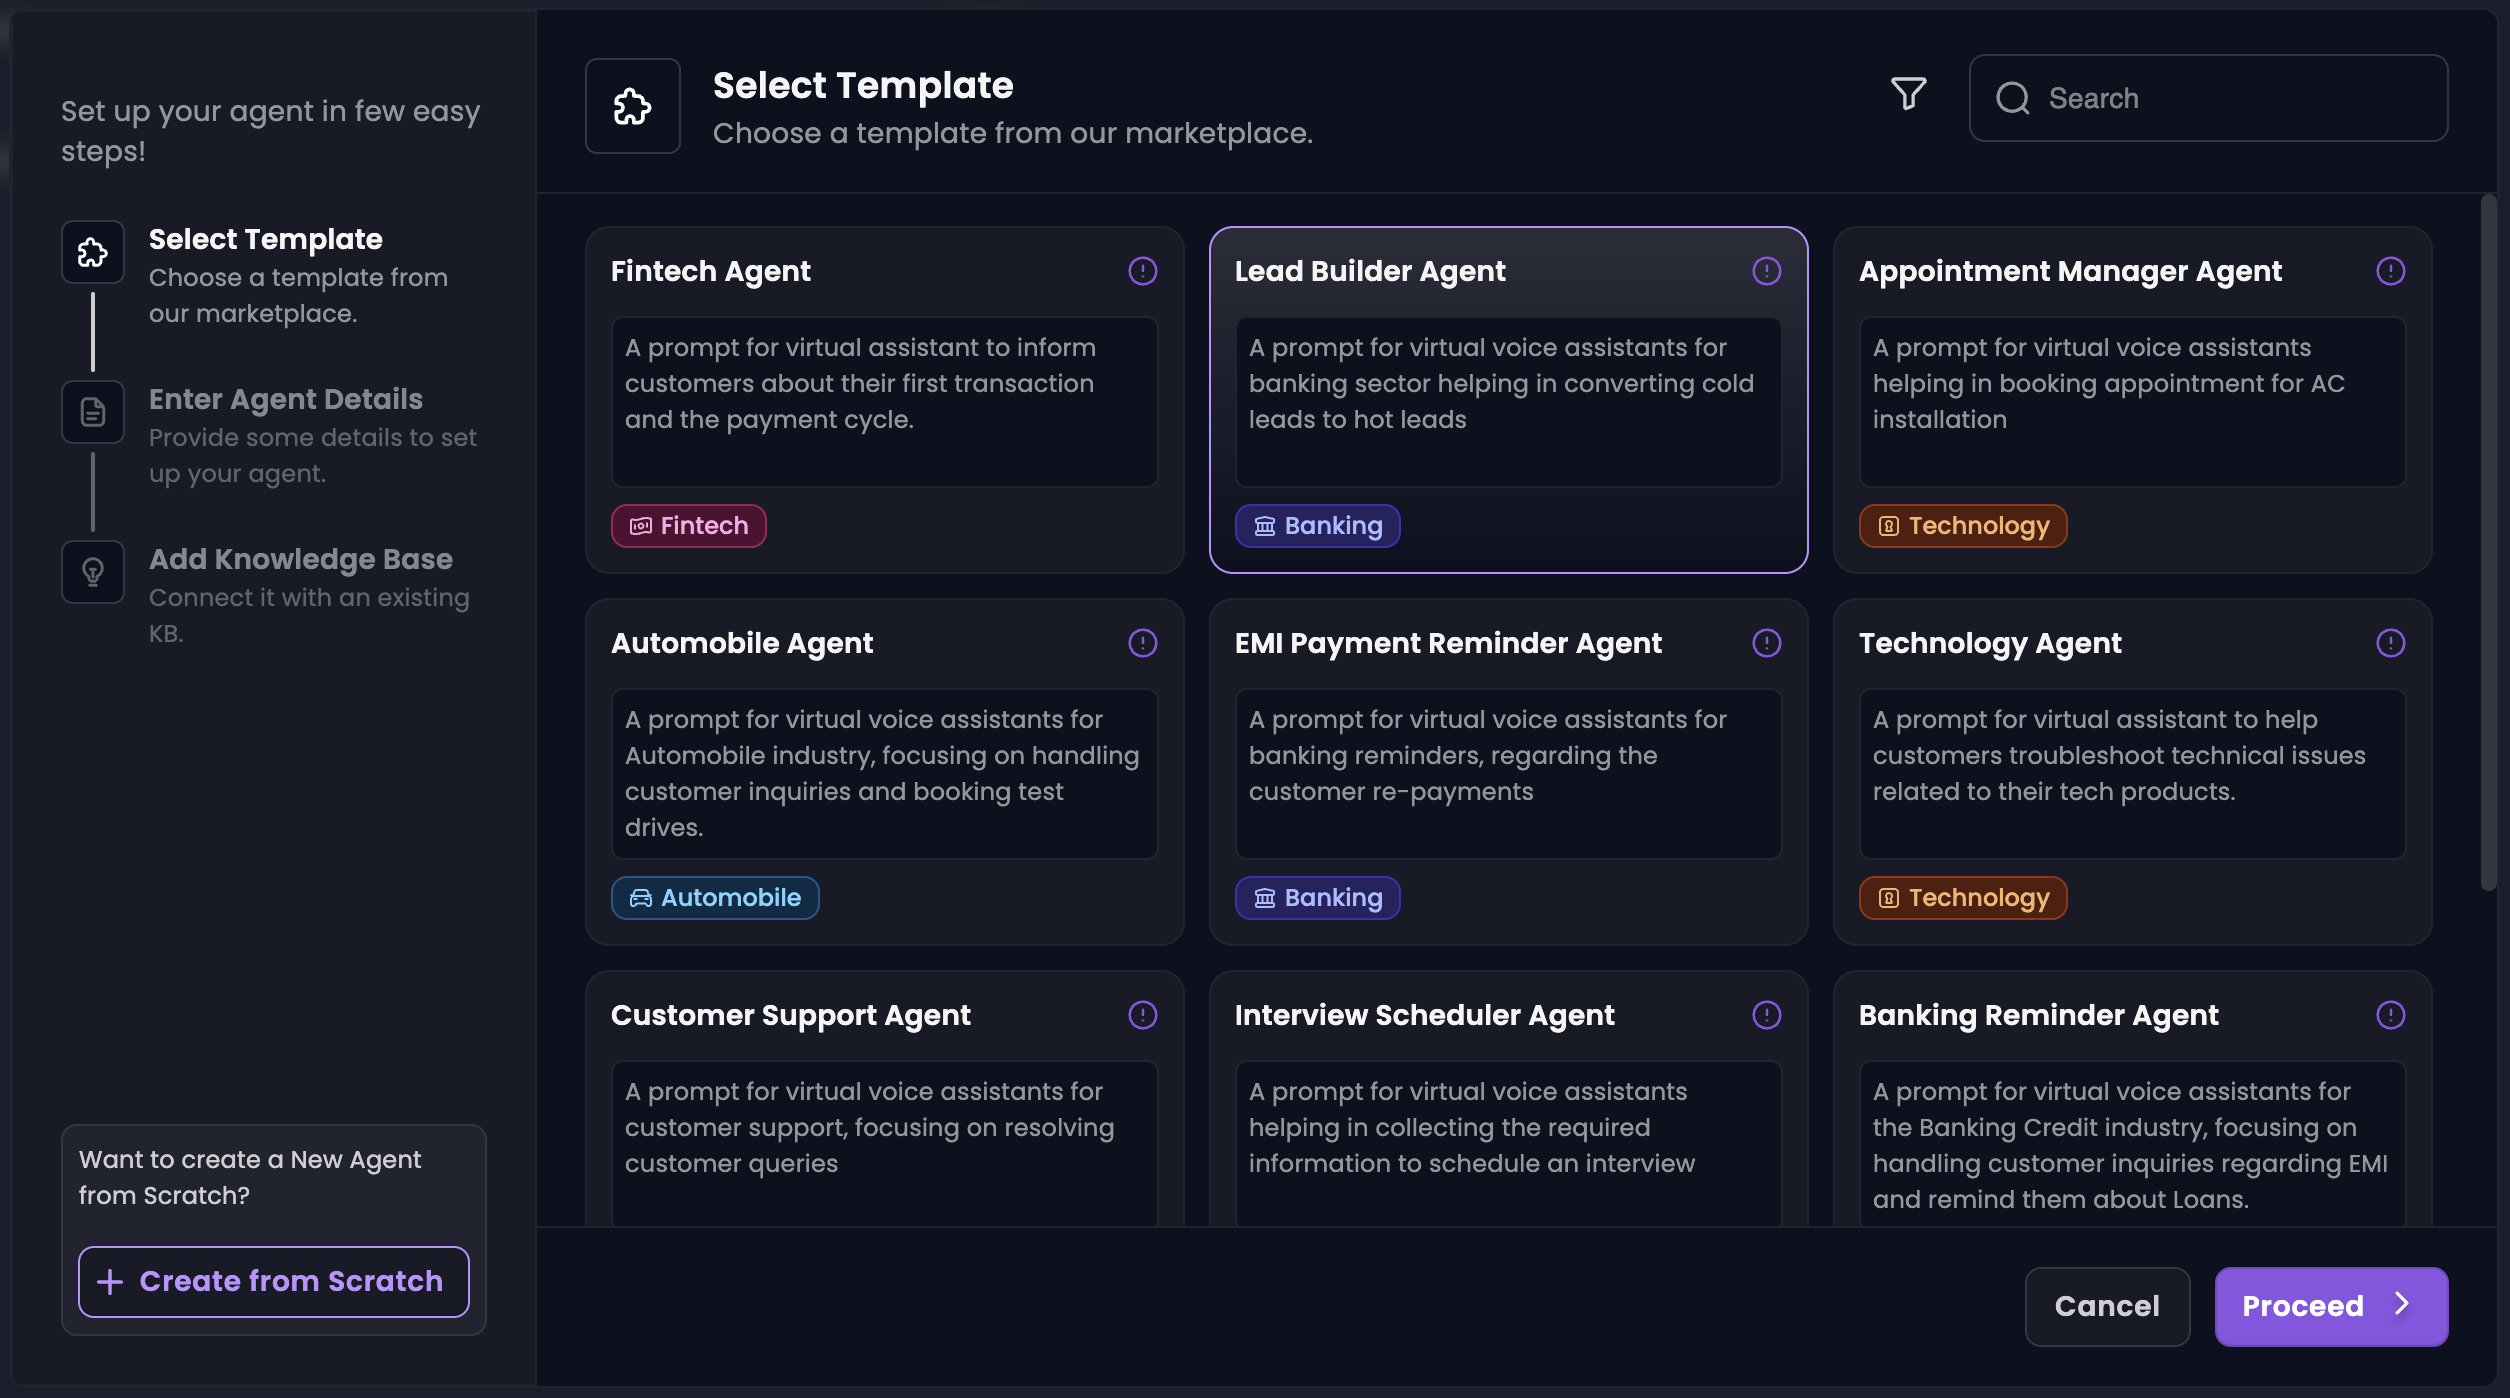
- Go to Manage Agents → Create Agent.
- Choose a template that best fits your needs and click on Proceed. You can customize your agent later.
- Name your agent, give a description for your understanding.
-
Link a knowledge base and click on Create.
Lesson 2: Writing a Great System Prompt
- What It Is: A system prompt defines your agent’s role, behavior, and objectives.
- Tips for a Great System Prompt:
- Set Clear Objectives: Provide specific details about what you want your agent to accomplish.
- Give Context: Provide some background information about the role, audience and purpose.
- Set Expectations: Explain the tone, style, and level of formality.
- Include Examples: Provide scenarios to guide responses.
Lesson 3: Setting the Model
- Greeting Message: Set the exact message your agent says at the start of the call. You can add dynamic variables to personlize your greeting message.
- Ending Message: Define the closing statement your agent delivers before ending the call.
- Provider & Model: Choose the LLM that powers your interactions.
- Link Knowledge Base: Connect your previously created knowledge base so your agent has information to draw upon.
- Temperature: This controls creativity. A higher value means more creative (but sometimes less precise) responses, whereas a lower value means conservative responses (sticking strictly to the knowledge base).
- Max Tokens: Limits the length of user’s responses that the agent can process in one input. A token is usually 3/4 of an English word or 3-4 characters.
Lesson 4: Customizing your Agent
Fine-tuning your agent’s settings ensures it not only understands but also reflects your brand’s personality. This section is where you polish the details. Head over to the Customize tab in Manage Agent section. Agent Details:- Language: Select the language(s) your agent communicates in. Choose a primary language if you’re selecting multiple languages.
- Region & Time Zone: Select the relevant Region and the Time Zone for your agent. This will set the time and will be used further (when integrations are used).
- Description: Specify the way your agent talks with the user.